Some industry experts consider rust as “the metal’s version of cancer”. Rust, indeed eats into the body of the car causing severe permanent damage. It is mandatory for car owners living in coastal areas and colder regions to use a good cavity wax as well as an undercoating product to stay well ahead of the curve.
Car manufacturers have taken more precautions in delivering cars with added protection against rust and corrosion. However, no amount of advancement in automobile technology has been able to offer a vehicle rust-proof completely.
Here is a simple guide that lets you take on the rust removal process with much ease.
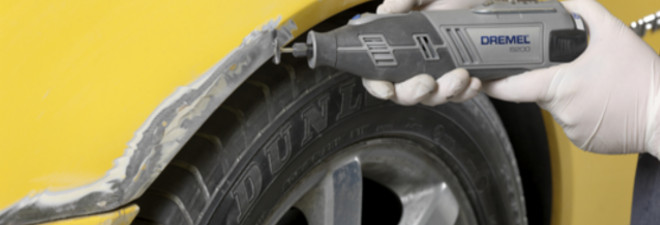
Step1: Use a Sandpaper to Clear Out the Rust
Use sandpaper and scrape off the rust until you can see the bare metal surface. Ensure the scraped surface is uniform to avoid imperfections after the application of paint on the surface.
Step 2: Apply a Rust Inhibitor
A number of rust inhibitor products are available in the market today and you may choose the one that best suits the car’s surface and the depth of damage. The inhibitor acts like an undercoat and prevents rusting in the future.
Step 3: Fill the Gap with a Primer
The minor dip caused by the sanding can be filled using a generous amount of primer. If the dip caused is much deeper then you may have to make use of fillers.
Step 4: Paint the Surface to Complete the Look
The final step is to re-paint the surface in order to achieve the finished look. Choose thin touch-up paint for a smoother look.